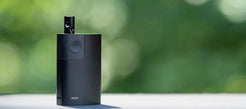
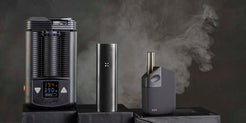
The slick MIQRO takes DaVinci’s trademark penchant for great vapor and packs it into a tiny package. The included instructions are a great start, and we’ve got the extra steps you should take for the perfect experience the first time.
What’s in the box
What's in the box |
||
|---|---|---|
Standard |
Explorer's Kit |
|
| Price | CAD$119.95 | CAD$159.95 |
| DaVinci MIQRO | ✔ | ✔ |
| 10mm Mouthpiece | ✔ | ✔ |
| USB Cable | ✔ | ✔ |
| Cleaning Kit | ✔ | ✔ |
| Batteries | 1 | 2 |
| Manual | ✔ | ✔ |
| Carry Can for Herb & Battery | ✔ | |
| Carrying Case | ✔ | |
| Grinder Card | ✔ | |
| Glove | ✔ | |
| Extra Pearl Post, Gasket & Pick | ✔ | |
Charging
Before you charge or attempt to use the MIQRO, flip open the bottom panel and remove the plastic pull tab from the battery compartment. Plug the MIQRO into your cell phone’s USB power adapter to charge it fully before trying it out. If you have an external charger, it will charge your 18350 batteries a lot faster than the USB cable.

Controls
Now that your MIQRO vaporizer is charged and ready to go, let’s get acquainted with the controls. Click the upper button five times to turn the MIQRO on, which will cause it to buzz and begin heating up.
The MIQRO has both direct temperature control and smart paths, and we recommend using smart path 3, the same setting the MIQRO comes out of the box set to. You can press up or down to change between the different smart paths.
Smart Path 1: 350-370
Smart Path 2: 370-390
Smart Path 3: 390-410
Smart Path 4: 410-430
Direct Control
If you want to set the temperature directly, rather than use one of the smart paths, you have that option. Press the control button once to show the temperature, and as the numbers are scrolling, start pressing the up or down button to change the temperature by one degree. The display will only show the last digit, but if you don’t press anything for a few seconds, it will show your current target temperature again.

Boost Mode
There’s also a boost mode, which you can engage by holding the control button. For as long as you hold the button, the heater will start climbing towards its maximum temperature. When you release the button, the heater will turn off and the unit will start cooling down, but you can press any button to start vaping again.
Burnoff
We recommend running a burnoff cycle on the MIQRO to make sure there’s nothing left over from manufacturing or shipping. Turn your DaVinci MIQRO on, then turn it up to smart path 4. Let it run until it shuts off on its own, and repeat this process if you still smell anything odd coming off the vaporizer.

Setup
The MIQRO’s slick oven surroundings make it easy to dump your favorite ground herb into it without spilling. You want a medium-fine grind, and a tight pack, for best results. Start it out on smart path 3 for your first session, and wait for the lights to stop blinking, indicating it’s up to temperature. You can either take short sips, or long draws, but the important part is to draw slowly for the best vapor. It also helps to give the heater 20-30 seconds after a long draw to warm back up.
Cleaning
Once you’re done with an oven, make sure to dump out the vaped remnants quickly to avoid any long-term buildup. It doesn’t need too much attention, thanks to its interior lining, so a few quick taps on the side should be enough to clear the oven. If you have a brush handy, it pays to brush it out, and also make sure to clean off the pearl while it’s still warm, but not right after use, as it will be very hot.


