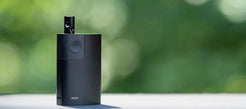
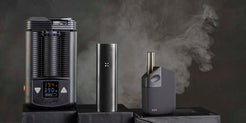
The Dr. Dabber Switch vaporizer may intimidate first-time users and newcomers alike. Luckily, this quickstart guide will cover all of the basics to get you going with your new concentrate rig!
Dr Dabber Switch Quickstart: What’s in the box
- Dr. Dabber Switch Vaporizer
- Battery Pack
- Glass Percolator Attachment
- White Ceramic Induction Cup (Oil)
- Black Ceramic Induction Cup (Leaf)
- Ceramic Leaf Filter Cap
- Glass Loading Tool & Carb Accessory
- Reverse Action Tweezers
- Silicone Storage Container
- Charging Cable and Adapter
- Instruction Manual

Charge it
To start off, let’s top off your Dr. Dabber Switch with a full charge. Grab the included power adapter and plug it into your Switch, and into a power source. Leave it plugged in until the red light on the power adapter turns from red to green, indicating a full charge. Flip the power switch to any mode and the Switch’s light band will light up to indicate its current charge.

Fill the bubbler
Before we put the Switch together, let’s fill the bubbler with water. Pour water into the mouthpiece, until it fills just past the percolator holes. Don’t fill it too much higher than the percolator or you’ll get water in your mouth. Connect the bubbler to the top of your Switch and give it a few test pulls to make sure it’s filled to your liking.

Test run
Let’s make sure your Switch is in working order before we load it up with concentrates. Flip the power switch to the left, or into oil mode, and look for the yellow LED light band to turn on. Use the + button to raise the temperature to its highest level (five yellow lights). With the reverse tweezers, load an empty induction cup into the bottom of the well. Press the center “Go” button and let it run a full cycle. Notice how the top lights are Red when heating up, and turn Green when it's ready to hit.

Oil: Choose your temp
With the power switch turned to oil mode, use the + - buttons to choose your desired temperature. Level One is best for maximum flavor, while Level Five is best for maximum vapor density. For this first session, try the middle temperature, or the third yellow light.
Load your cup
The Switch can be heated up first, and then loaded, just like a traditional torch and banger, but we’ll preload it first for this initial session. Take the ceramic cup out of the Switch with the reverse tweezers, and load it with a rice-grain sized amount of your chosen concentrate. Use the tweezers to place the cup into the bottom of the glass well, put the carb cap on top, and get ready for take off.


Fire it up
Once you’re ready for your first hit, press the “Go” button to engage the heater. The LED light band will turn red and escalate to indicate that it’s heating. It will turn green when it’s ready to go. The Switch’s unmatched heat up time will have it ready within seconds, so be ready! Once the lights turn green, you’ll have 15 seconds to hit it until the heater shuts off. Press the Go button anytime before then to manually end the session.
Advanced mode
This Quickstart Guide is meant to quickly get you up and running with your first dab. Once you’re ready for more than the stock five temperatures, it’s time to play with Advanced mode. While the Switch is off, hold in the Go button and flip the toggle button to oil mode. The lights will turn multi-colored if you did it correctly. Now you have 25 temperature settings, from 300° F to 800° F (148° C - 426° C) in 20 degree increments!

For dry herbs
We didn’t cover Leaf mode for the Switch because we don’t consider it a dry herb vaporizer. It’s more of an herbal smoker that gently heats your herbs, producing a light vapor at first that quickly gives way to smokiness. We highly recommend a dry herb vaporizer for your loose leaf herbs.
Cleanup
The Switch makes cleaning an absolute breeze with its self cleaning mode. Press and hold the + button until it reaches the highest level and continue holding for five more seconds. Release the button once the lights turn Red, and let it run its full cycle. Easy as that!


