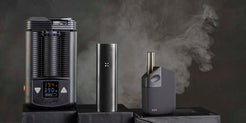
The Venty vaporizer from Storz & Bickel comes primed and ready to produce thick, satisfying results. Follow along with our quickstart guide to start your vaporizing journey hot with a great first session.
How to use the Venty vaporizer: Quick summary
- Charge it
- Controls
- Run a burnoff
- Grind and pack
- Set the airflow slider
- Turn it on and set the temperature
- Take a hit!
- Brush out the oven when you're finished
What’s in the box
- 1 x VENTY Vaporizer
- 1 x USB-C Cable
- 2 x Normal Screen, small
- 3 x Coarse Screen, small
- 2 x Cooling Unit Screen
- 2 x O-Ring
- 1 x Filling Chamber Tool
- 1 x Cleaning Brush
- 1 x Instructions for Use (concise)

Fully the charge the Venty
Take the included charge cable and fully charge your Venty before we begin our first session. Plug it into the nearest power outlet, and it’ll light up and blink with its current charge. The lights will turn solid when fully charged and ready to go.
Note: A computer or PC port is not sufficient enough to charge. Plug into a wall outlet with a wall adapter or the Storz & Bickel Supercharger.

Three-button controls
The Venty vaporizer has three onboard control buttons: a single power button and two precise temperature control buttons.
Press and hold the power button on the side to turn it on and off, and then use the up and down arrow buttons to select a temperature.

Cleanse the vape with a burnoff
Before every session, we suggest a burnoff to cleanse brand new vapes of any leftover manufacturing residues. Turn the Venty on, set it to the max temperature of 410°F / 210°C, and let it run for an entire session.
Note: If necessary, press the Up and Down buttons together to switch between Fahrenheit and Celsius.

Grind your herbs and fill the oven
The Venty’s hybrid heater does well with various grinds, but I recommend a medium to medium-fine grind for the best results. Take any grinder you have and chop up enough herbs to fill the oven.
Then, twist the Venty’s cooling unit counterclockwise to remove it, and fill the oven to the top with your ground herbs. Don’t press the herbs down. Fill it enough to create a small mound at the top, twist the cooling unit clockwise back into place, and then you’re good to go.

Set the airflow slider
The Venty comes with a handy airflow slider that adjusts its draw resistance. It comes with three “settings” indicated by little notches: 1 notch being the tightest and 3 being the most open. However, you can set it anywhere in between these notches.
Where you set the slider is a personal preference and I recommend you find your sweet spot. If you’re unsure, I recommend you set it right in the middle at notch #2.

Turn it on and set the temperature
We’ll create a nice blend of dense and flavorful vapor for this first session. Turn your Venty on and set the temperature to 385°F / 196°C. When it vibrates, it’s ready to go!

Take a hit!
Once the Venty vibrates, take a short, gentle puff of just a few seconds to get a feel for it, exhale, and jump back in as you please. The Venty does very well with different draw styles, so hit it hard or take gentle sips however you like!

Brush out the oven when you’re finished
When you’re all finished, take the included cleaning brush and brush the oven and bottom of the cooling unit clean. Do this while the oven is still warm to prevent tough buildup in the long run. 


