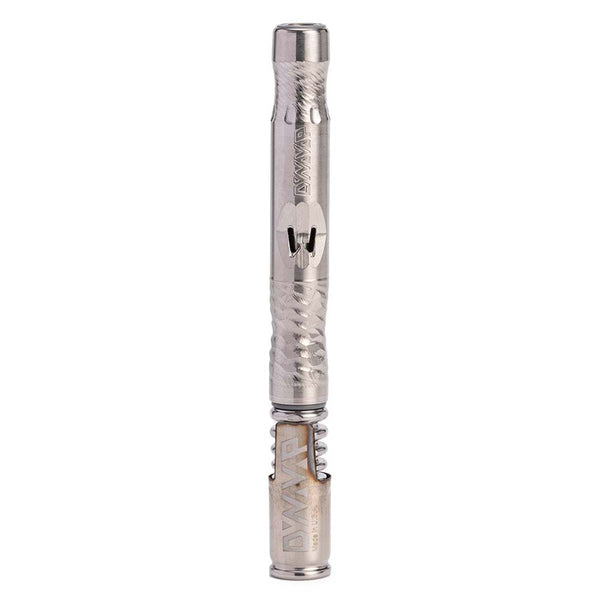
A clean VapCap dry herb vaporizer produces plenty of vapor with clean flavors. Luckily, VapCaps are easy to clean thanks to DynaVap’s commitment to modular design and simple components. You do need to break things down a little bit to clean everything out, but not to worry, it’s a relatively painless process with just a few simple steps.
DynaVap VapCap Clean up: Quick summary
- Fully take apart your VapCap
- Wipe down the inside of the cap
- Soak all the other metal pieces, rinse and dry
- Apply wax to wood pieces
- If necessary, soak o-rings, rinse and dry
- Reassemble
- Great vapor
- Amazingly small
- Crazy low price
- Captive cap stays put
- Dual airports

DynaVap M Vaporizer
Starting at C$80.00 Regular price: C$100.00
The DynaVap M is a ridiculous value. The vapor is strong, the size is miniscule, and the low price will surprise you!
Free Canadian Shipping
Easy Returns
Expert Advice
DynaVap Cleaning Guide: What you’ll need
While you might be tempted to take isopropyl alcohol to the VapCap parts, DynaVap recommends against it. That said, if you find your VapCap is really gunked up, the metal parts can be soaked in isopropyl alcohol briefly, just make sure to rinse them thoroughly and give them plenty of time to dry after.
In most cases, hot, soapy water or any safe cleaning solution will do the trick just fine. You’ll want some kind of container to soak the pieces in -- the tube your VapCap came in will work great. If you have a VapCap M, you can also just drop it in the silverware basket in your dishwasher.
Pull it apart
First, separate the VapCap vaporizer into its individual components. There are no latches or levers - you simply pull them apart. It takes a bit of strength to divide them, and sometimes a little twist can help the process along.
Your goal is to completely disassemble your VapCap into three groups of components, based on material type. Metal components, apart from the lid, can go into the plastic tube for soaking. Wood pieces should be set aside, as they shouldn’t need cleaning, but might benefit from a touch of DynaWax. The o-rings and gaskets are easy to lose, so if they need to be cleaned, soak them in warm, soapy water in a glass of their own.

Wipe out the cap by itself
If your cap has a little bit of build-up inside, you can dip a cotton swab in some isopropyl alcohol and swirl it around the inside of the DynaVap cap. You shouldn’t soak the cap itself, but it is dishwasher safe, if it has some buildup.

Soak the metal parts
The metal parts can soak in hot, soapy water, pipe cleaning fluid, or isopropyl alcohol, as long as you rinse them thoroughly afterwards. Fill the tube halfway with your cleaning solution of choice, drop the metal pieces in, and give it a hearty shake.

Floss with pipe cleaners
After a thorough shake and soak, the VapCap pieces should be ready to dry and reassemble. If not, the best way to clean them up is to simply run a pipe cleaner inside like floss. It’s a particularly good way to ensure the inside of the condenser is totally clean, which is important for a smooth draw.
Replacing the rings
The two o-rings can be tricky to replace on the VapCap. First, lubricate the rings with a little bit of water, or DynaVap’s own DynaWax. The small ring goes further in on the condenser tube, and should sit right in the groove. Place the larger ring around the end, flush with the end of the condenser tube.
Reassemble
Once everything is dry, and the rings have been replaced on the condenser, it’s time to put your VapCap back together. Carefully insert the condenser into the mouthpiece and body unit, and hold the end ring so it fits flush into the end of the mouthpiece. If you have trouble, you can blow into the body for a few seconds, which will help the condenser and rings fit back in easily. Work the inside end of the tip over the exposed end of the condenser tube, then twist and push in until it’s snug and tight into the body.
👉 Shop DynaVap Parts and Accessories

DynaVap M Vaporizer
Starting at C$80.00 Regular price: C$100.00
The DynaVap M is a ridiculous value. The vapor is strong, the size is miniscule, and the low price will surprise you!
- Great vapor
- Amazingly small
- Crazy low price
- Captive cap stays put
- Dual airports


