Table of contents

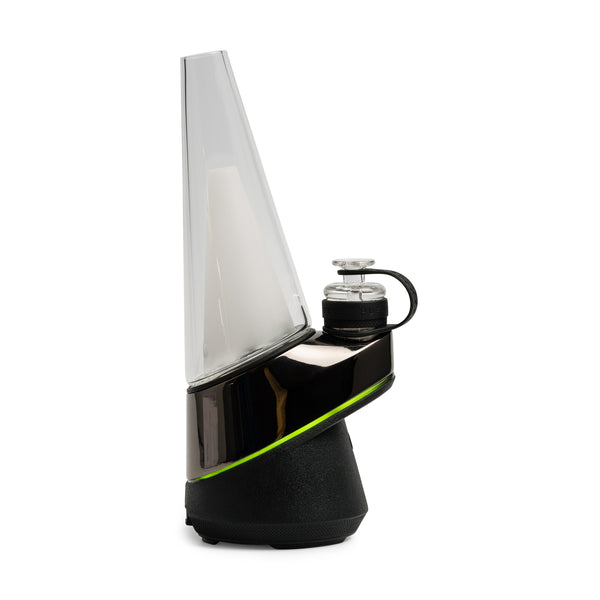
Puffco Peak Vaporizer
C$319.95 Regular price: C$389.99
Free Canadian Shipping
Easy Returns
Expert Advice
The Puffco Peak pumps out clouds like no other, and you’re bound to make a mess. Whether you’re a casual user or a heavy hitter, we’ve got you covered. We’ve laid out all the steps and details to hook you up with a spotless Peak!

Puffco Peak Cleaning: A Quick Summary
- Take apart the atomizer
- Soak the pieces
- Rinse and dry
- Clean the bubbler
- Reassemble
- Run a burnoff
- Done!
What you need
Cleaning your Peak is very simple and can be done with just a few household items.
- Rubbing alcohol
- Small cup for soaking
Take it apart
To start, let’s remove all of the pieces of your Peak and assess the damage. Grab hold of the atomizer and give it a counterclockwise turn until it loosens, and remove it from the base. The atomizer separates into four different pieces but to prevent any damage, Puffco recommends keeping it all together and dropping it into some rubbing alcohol to soak.

In our testing, we found that taking it apart was the best way to clean out the entire atomizer. To do this, simply slip the rubber seal off and remove the ceramic bowl. Remove the ceramic bracket inside of the rubber seal as well. The ceramic bowl and plate inside the metal housing are very fragile, so be careful and disassemble at your own risk.

Empty the bubbler and remove it from the base. Gently pulling the glass down and away from the base should do the trick.
Time to soak
Fill the bubbler a little less than half way with rubbing alcohol, cover the opening, and shake it to loosen up any gunk inside. You may need to let the bubbler soak overnight to loosen up thicker concentrate buildup. Once it’s nice and clean, rinse it out with fresh water and set it out to dry.
Drop the entire atomizer, either assembled or disassembled, and the carb cap into a cup of rubbing alcohol to soak for a few hours. The tether shouldn’t need much attention so set that aside for now. The alcohol will change to an amber color as the pieces soak. When the soak is finished, rinse the pieces off with warm water and let them dry out.
Put it back together
Now that the hard part is over, let’s throw it back together! If you kept the atomizer intact, simply screw it back onto the base and you’re good!
If not, slip the ceramic buckle back into the rubber seal and gently place the ceramic bowl back inside the metal housing. Then, place the seal back on top by lining up the three teeth on the buckle with the gaps along the metal housing, and gently press together. Be careful with this piece - this is where you can easily break your atomizer. When done correctly, the seal should be nice and flat, and the ceramic bowl shouldn't be loose. Now, take the entire atomizer and screw it back onto the base until it’s nice and tight. Push down as you twist so that the threading catches.

Finally, take the bubbler and fill it up with water, just past the air holes. Always do this away from the electronic base to prevent any damage. Then, take the Puffco Peak glass part and attach it back onto the base. The key here is to make sure the bottom air hole on the outside of the bubbler is lined up with the intake hole on the base. Take a few test draws to make sure everything is lined up and good to go.
Run a burnoff
To finish off this deep cleaning, let’s run a quick burnoff. Turn your Puffco Peak on and toggle up to the highest temperature setting (White). Engage the heater with a double tap and let it run a full cycle with the carb cap off. We’ll do this a few times to be thorough before diving into a fresh session.

If your Peak starts flashing multiple colors, check the atomizer and make sure it’s tight enough.
Conclusion: Tips for a cleaner vape
If you tend to clean the atomizer more frequently than you'd like, use less material in your sessions. The sweet spot is any amount of concentrate you can fully vaporize without any leftovers. Experiment with different load sizes and temperatures, and find the combination that provides a satisfying hit without a mess to clean later. We also suggest dumping and rinsing out the bubbler after you’re finished for the day so that nothing settles and sticks to the glass. You’d be surprised at how dirty it can get! Adopt these tips into your routine for a happier and healthier Puffco Peak.


