


DynaVap’s unique VapCap line works a little bit differently from most vaporizers. Instead of an electric heating element and digital controls, you heat the VapCap precisely with a butane torch lighter, wait for a click, and inhale at the right speed to produce vapor. Once you’ve gotten used to the DynaVap, you’ll be able to produce thick vapor quickly and reliably, and our guide will help you along the way.

What’s in the box
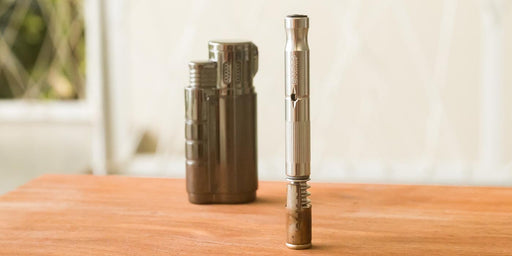
There isn’t much to unboxing the VapCap. Simply pop open the end of the tube, and slide out your new DynaVap vaporizer. The tube is great for carrying around the VapCap in your pocket without taking up too much space. Unless you got the DynaVap M, your DynaVap is actually made up of a series of modular parts. They come fully assembled, and if you want to change it up, you can simply grab an extra part, or buy a second VapCap to mix and match.
Respect the clicks
DynaVap warns users to “respect the click” and for good reason. When you are heating your DynaVap it will click both to indicate that it has reached vaporization temp, and again when it’s back below vaping temp. You may actually hear two clicks, a small click, then a louder one right after. These are the same “click” and the second is there for redundancy -- and to make sure you hear them.
The first set of clicks
When you hear the first click, remove the VapCap from heat immediately, or you’ll risk burning your herbs and permanently damaging your DynaVap. If you keep heating past the click, you’re likely to combust your herbs, and potentially damage the VapCap. As soon as you hear it, the VapCap is ready to vape, so go ahead and put your lips to the mouthpiece on the opposite end from the cap -- NOT the end you just held a lighter to -- and draw. We have some tips below on how to get the best experience there.
Wait for the second set to re-heat
You’ll hear a second set of clicks when the VapCap drops below vaping temperature, which could take up to a minute. Don’t apply the heat again until you’re sure you’ve heard the second click. If you aren’t sure, wait a few minutes to ensure it actually cools down enough, or you might burn your herbs and damage the tip.

Picking a lighter
You’ll need a lighter to heat up your VapCap, preferably a butane torch lighter, as your classic soft flame lighter will leave soot marks on the DynaVap’s tips, and take a lot longer to heat up. A single flame torch will give you better control over temperature, at the cost of slightly slower heat up time. Torches with more flames will let you heat the DynaVap quickly, with less precise temperature control. They’re cheap enough you can pick up a few for under CAD$30 and see which you like, or use them for different situations.
Bleed the torch First
Before you fill your torch, you’ll want to clear out any extra butane left inside. Turn it upside down, so the filling hole is facing upwards. Using a small screwdriver or thumbtack -- DO NOT use a ballpoint pen tip -- press on the edge of the filling port and hold down until the hissing stops completely, which could take up to a minute.
Fill the torch
To fill it, turn it upside down and press your butane tank into the filling hole on the bottom for four to five seconds, until it stops filling up. Hold the torch in your hand for 30 seconds until the lighter is at room temperature, then use the adjuster on the bottom until the flame is as low as it will go without flickering.
DynaVap induction heaters
If you’d rather ditch the torch for something simpler, check out our line of DynaVap Induction Heaters! The Apollo 2 induction heater will power your sessions all day long and is the perfect heater for the strictly at-home user. If you need a more travel-friendly option, check out the Apollo 2 Rover and the Orion!

A wide range of grinds
The DynaVap is happy to handle basically any herb consistency. If it’s too fine, it may pull through the screen, and if it’s too chunky, it might need stirring, but basically any two or four piece grinder works great.
A level scoop
One way to load your VapCap is to simply remove the cap on the end, and scoop your herbs straight out of the grinder. You want to fill the oven until your herbs are level with the open end of the tip. Tamping it is fine, and the back end of a ballpoint pen makes an excellent packing tool. Packing too tightly will restrict the airflow, but should still vape. When you’re done packing it, slide the cap back onto the VapCap, and you’re ready to go.
The straw method
You can also load the VapCap by taking off the cap, putting the tip into your grinder, and sucking on the mouthpiece. This will vacuum up the herbs into the oven, no tamping required. It can save you some sticky fingers, and is a little cleaner. Make sure the herbs aren’t too fine, or you may end up with some unpleasant snacks.

How to heat
Take the torch lighter in one hand, and hold the VapCap in your other. Turn on the torch, then hold the cap in the light blue halo around the dark blue part of the flame -- that’s the hottest part. Keep rotating the VapCap slowly between your fingers, so it evenly heats all sides, like an herb rotisserie -- don’t apply heat directly to the end of the cap, only the sides. Ideally, you’ll apply it at about a 45 degree angle facing away from you, pointing from the base up towards the far corner of the tip.
How long does it take?
Depending on a number of factors, it should take anywhere from eight to 15 seconds for the VapCap to click, letting you know it’s time to turn off the lighter and vape. It may take a little longer at first as you get used to holding and spinning while keeping the tip in the lighter, but you’ll get used to it.
You control the temperature
You can even vary the temperature by moving the flame. If you keep the flame further out towards the tip, the vapor will stay on the cooler side. Bring the flame lower down on the cap, towards the mouthpiece, to heat it up.
Pull slow, or pull fast
Once the VapCap clicks, it’s time to draw. You have plenty of options here, thanks to a small airport on the side of the device which works just the carb on a pipe. You can easily adjust the resistance by covering the airport with your index finger, grabbing the other side with your thumb, and slowly rotating the VapCap so your finger only covers part of the hole. Cover more of the airport for thicker clouds and a slower draw, or leave it open for a wide open draw, and adjust mid-draw as you taste the vapor.
Related: DynaVap Buyer's Guide
Fixed resistance
If you want to dial it in semi-permanently, you can put a small piece of scotch tape over the airport, then poke a hole in it, then widen it slightly until it’s set. After some time with your DynaVap, you’ll find your preferred airflow and pace for a perfect hit. The OmniVap mouthpieces fit onto all non-M VapCaps, and also let you twist the end to set the resistance so you don’t have to worry about it.

Cooling down
After you’ve taken a draw, make sure to wait until the VapCap clicks again before you apply any more heat. It may take up to a minute, so if you don’t hear the click, make sure to wait a few minutes. It’s better to wait a little longer until your next hit than scorch everything inside. At this point, you can fire it up again, leave it be until you’re ready for another, or let it cool down a little further to unload. DynaVap sells magnetic stands you can set it on when you’re done, or you can set it upright on the underside of your grinder lid, if it has a center magnet, as some do. Rubbing it around in a small circle on the metal can also help cool it down faster.

Empty the chamber
Once you’ve given it some time to cool down a bit, at least a few minutes after the second click, so you don’t burn yourself, it’s a good idea to dump out the oven. This will help keep your VapCap vaporizer cleaner in the long run, and save you some deeper cleaning sessions.The VapCap’s lid has a small poker that you can use to knock out any bits that remain after tapping on it.